Building a traditional sauna at home may seem like a daunting task, but with the right guidance, it can become an enjoyable and rewarding experience. In this article, we will explore the step-by-step process of constructing your own sauna, from choosing the ideal location to selecting the right materials and creating a relaxing atmosphere. So whether you are a seasoned DIY enthusiast or a first-time builder, get ready to embark on a journey of warmth and tranquility as we guide you through the process of building your very own traditional sauna at home.
Choosing the Location
When it comes to building a traditional sauna at home, one of the first and most important considerations is choosing the right location. The location of your sauna can greatly impact your overall sauna experience, so it’s essential to think carefully before making a decision.
Considerations for the Sauna Location
To start, consider how accessible you want your sauna to be. Is it something you want to have easy access to from your home, or would you prefer it to be a separate space? Think about how often you’ll be using the sauna and whether you want it to be conveniently located or more secluded.
Another factor to consider is the privacy of the location. If privacy is important to you, you may want to choose a location that is shielded from view, either by surrounding trees or by positioning the sauna in a more remote area of your property.
Indoor or Outdoor Sauna?
Once you’ve decided on the general location, you’ll need to determine whether you want an indoor or outdoor sauna. Each option has its own advantages and considerations, so it’s worth thinking through. An indoor sauna provides convenient access regardless of the weather and eliminates the need to go outdoors. On the other hand, an outdoor sauna can offer a more serene and natural experience.
Available Space
Consider the available space you have for your sauna. It’s crucial to choose a location that has enough room to accommodate the size of the sauna you want to build. Ensure that the space is not cramped, as this can limit the comfort and functionality of the sauna.
Ventilation and Insulation
Lastly, think about ventilation and insulation in your chosen location. Proper ventilation is critical for maintaining a comfortable sauna environment and preventing excess moisture buildup. Additionally, insulation is necessary to retain heat and ensure that your sauna is energy efficient. Take into account any windows or natural ventilation opportunities when deciding on the location.
Designing the Sauna
Once you’ve settled on the location, it’s time to move on to designing your sauna. There are several design considerations to keep in mind, from the type of sauna to the layout and even the style of the sauna door.
Decide on the Sauna Type
First and foremost, decide on the type of sauna you want to build. Traditional saunas typically use dry heat generated by a wood-burning or electric stove. However, you may also consider infrared saunas, which use infrared heaters to directly heat your body, or steam saunas, which utilize moist heat.
Traditional Sauna Layout
When it comes to the layout of your traditional sauna, there are a few key elements to consider. One important aspect is the location of the sauna benches. Traditionally, the upper bench is hotter, while the lower bench is cooler. Design your sauna with multiple levels of benches to cater to different preferences.
Sauna Bench Design
The design of your sauna benches also plays a role in the overall comfort and functionality of your sauna. Smooth, amply sized benches made from high-quality wood are essential for a pleasant sauna experience. Consider cushioning options or adding ergonomic features to enhance comfort.
Sauna Door Options
Lastly, don’t overlook the importance of choosing the right sauna door. The door should be sturdy, durable, and well-insulated to prevent heat loss. Consider options such as glass windows for added aesthetic appeal and the ability to see inside the sauna while maintaining privacy.

Gathering Materials
Once you have a clear design plan in mind, it’s time to gather all the necessary materials for your sauna project. From the wood used to construct the sauna to the stones and stove that generate the heat, each element is important in creating a traditional sauna experience.
Choose the Right Wood
When it comes to choosing the wood for your sauna, opt for a softwood that can withstand high temperatures and humidity levels. Cedar and Nordic spruce are popular choices due to their natural resistance to moisture and insects. Select wood that is sustainably sourced and free from chemicals or treatments.
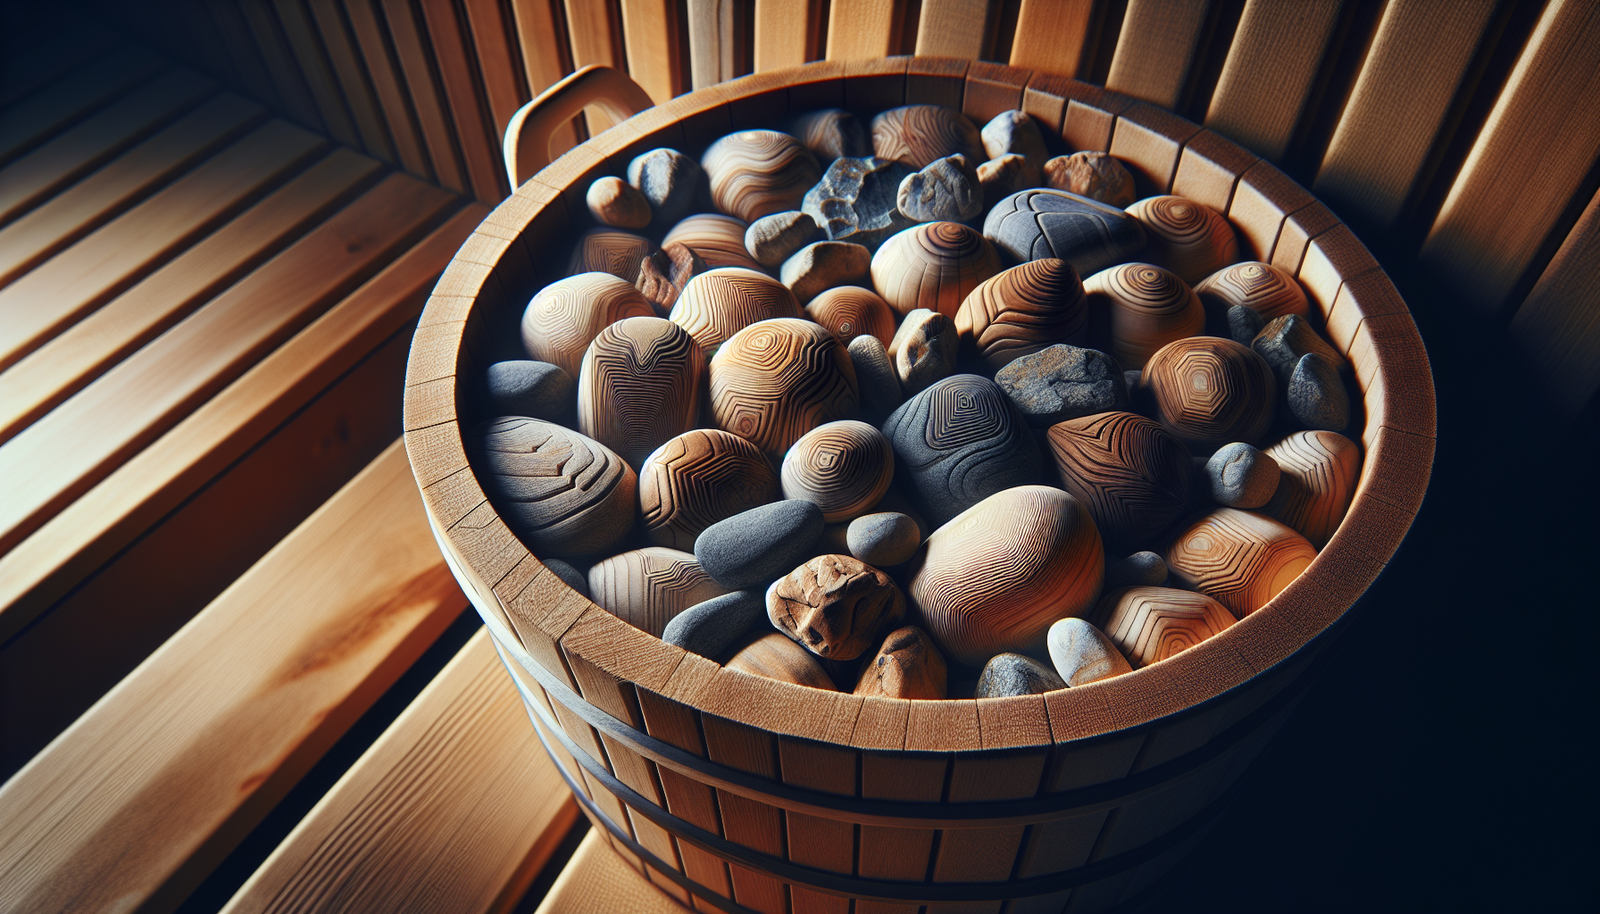
Acquiring Sauna Stones
Sauna stones are an essential component of a traditional sauna, as they absorb and radiate heat. Look for stones that are suitable for use in saunas and have good heat retention properties. Finnish or soapstone varieties are often recommended due to their excellent heat storage capabilities.
Equipment and Accessories
Consider the equipment and accessories that will enhance your sauna experience. Essential items include a sauna bucket and ladle for water infusion, as well as a thermometer and hygrometer to monitor temperature and humidity levels. Other optional accessories may include backrests, lighting fixtures, and timers.
Sauna Stove Selection
When selecting a sauna stove, choose one that is appropriate for the size of your sauna and meets safety regulations. Electric stoves are popular for their convenience and flexibility, while wood-burning stoves provide an authentic and aromatic experience. Carefully consider the power output, safety features, and control options offered by different stove models.
Preparing the Space
Before you begin building the physical sauna structure, certain preparations need to be made to ensure optimal sauna performance and longevity.
Cleaning and Preparing the Area
Thoroughly clean the chosen area to remove any debris or obstructions. This step helps create a clean and suitable foundation for your sauna. If you plan to build an indoor sauna, clear the space of any existing fixtures or furniture. Outdoors, remove vegetation or other elements that could interfere with construction.
Installing Vapor Barrier and Insulation
To prevent moisture from seeping into the surrounding walls and causing damage, it’s crucial to install a vapor barrier. This barrier should be placed between the sauna walls and the insulation. Proper insulation is essential for regulating temperature and maintaining energy efficiency within the sauna.
Wiring and Lighting
If your sauna requires electrical wiring, ensure that it is performed by a licensed electrician. The wiring should comply with local building codes and safety standards. Adequate lighting is also important for creating a welcoming and functional sauna space. Consider LED lights or dimmable fixtures that emit a warm glow.

Building the Sauna Structure
With the necessary preparations complete, it’s time to start building the physical structure of your sauna. This involves constructing the sauna frame, walls, ceiling, benches, and ensuring proper ventilation.
Frame Construction
Constructing the sauna frame provides the structural support for the sauna walls and ceiling. Use quality lumber and precise measurements to ensure a sturdy and level framework. Depending on your design, the frame may include additional support for the bench and stove.
Installing Sauna Walls and Ceiling
Once the frame is in place, install the sauna walls and ceiling using tongue-and-groove boards or sauna paneling. Secure the boards tightly, ensuring there are no gaps that could compromise insulation or allow heat to escape. Consider adding insulation between the studs if extra thermal efficiency is desired.
Adding Ventilation
To maintain air circulation and prevent excessive moisture buildup, installing ventilation is crucial. This can be achieved through vents or fans strategically placed in the sauna walls. Ventilation also helps remove any smoke or odors that may occur when using a wood-burning stove.
Building Sauna Benches
The sauna benches provide the seating and relaxation areas within the sauna. Construct the benches using the same high-quality wood chosen for the sauna walls and ceiling. Ensure that they are securely fastened and have appropriate dimensions to accommodate multiple sauna-goers comfortably.
Insulating the Sauna
Proper insulation is a critical aspect of building a traditional sauna, as it allows the sauna to retain heat effectively and maintain a consistent temperature. Insulating the walls, ceiling, and door ensures the sauna remains energy efficient and provides a comfortable experience.
Choosing the Right Sauna Insulation
Selecting the appropriate insulation material is crucial for thermal efficiency and safety. Mineral wool or fiberglass insulation batts are commonly used due to their heat resistance and moisture repellent properties. Ensure that the insulation you choose meets fire safety standards.
Applying Insulation to Walls and Ceiling
Install the insulation between the sauna walls and the exterior cladding. Ensure a snug fit without any gaps to minimize heat loss. Pay careful attention to areas around windows or doors, as they are more susceptible to temperature variances. Follow the insulation manufacturer’s guidelines for installation.
Insulating the Sauna Door
The sauna door is a key component in maintaining proper insulation. Apply insulation to the interior of the door, ensuring it fits securely and forms a tight seal. Use weatherstripping or gaskets to prevent any air leakage. The door should open and close smoothly while maintaining the sauna’s desired temperature.
Insulation Safety Measures
When working with insulation materials, it is important to take safety precautions. Wear appropriate protective gear such as gloves, goggles, and a mask to prevent irritation or injury. Follow the manufacturer’s instructions for handling, cutting, and installing the insulation to minimize potential risks.
Installing the Sauna Heater
The sauna heater is the heart of the traditional sauna, responsible for generating the heat that creates the sauna experience. Proper installation and positioning of the sauna heater are crucial to ensure efficient operation and user safety.
Determining Heater Location
Consider the size and layout of the sauna when determining the location of your heater. The heater should be placed where it can evenly distribute heat throughout the sauna without obstructing the seating areas. Install the heater according to the manufacturer’s instructions, ensuring proper clearances and ventilation requirements.
Connecting the Sauna Heater
Consult a licensed electrician to handle the electrical connection of your sauna heater. Ensure that the wiring and electrical components meet all safety requirements. Follow the manufacturer’s instructions for connecting the heater to the power source, and double-check all connections before use.
Positioning Sauna Stones
Arrange the sauna stones carefully on top of the sauna heater. The stones act as a heat reservoir, absorbing and releasing heat during sauna sessions. Choose stones that are suitable for sauna use and ensure they are placed securely to prevent them from falling into the sauna or causing any hazards.
Testing for Proper Operation
Before using your sauna, perform a test run of the heater to ensure it is functioning properly. Observe the heat distribution, ventilation effectiveness, and any odor or smoke emissions. Monitor the sauna temperature and adjust the heater controls as needed until you achieve the desired sauna experience.
Preparing the Sauna Room
To complete your traditional sauna, you need to focus on preparing the sauna room itself. This involves sealing the walls and ceiling, applying a sauna finish, and adding essential sauna accessories.
Sealing the Sauna Walls and Ceiling
To create a watertight and visually appealing sauna, seal the sauna walls and ceiling with an appropriate sauna sealant. This helps protect the wood from humidity and prevents any moisture from penetrating the sauna structure. Follow the sealant manufacturer’s instructions for proper application and drying time.
Applying Sauna Finish
Applying a sauna finish to the interior wood surfaces further enhances the durability and aesthetics of your sauna. Choose a sauna-specific wood treatment that is heat resistant, moisture repellent, and safe for use in a high-temperature environment. Apply the finish with a brush or cloth, following the product instructions.
Adding Sauna Accessories
Personalize your sauna experience by adding accessories such as towel hooks, backrests, and storage shelves. These simple touches enhance comfort and convenience during sauna sessions. Consider accessories made from materials that can withstand high temperatures and are resistant to humidity and mold.
Installing Thermometer and Hygrometer
Installing a sauna thermometer and hygrometer allows you to monitor and control the temperature and humidity levels inside your sauna. These instruments provide valuable feedback on sauna conditions, ensuring a safe and enjoyable experience. Mount them in a visible location that is easily accessible while inside the sauna.
Finalizing the Sauna
Now that you’ve built and prepared your traditional sauna, it’s time to give it a final touch and ensure its cleanliness and functionality.
Cleaning the Sauna Interior
Before using your sauna, thoroughly clean the interior to remove any dust, debris, or residues left from the construction process. Wipe down all surfaces with a mild cleaning solution that is suitable for saunas. Regular cleaning helps maintain the hygiene and longevity of your sauna.
Testing the Sauna
Perform a final test of all sauna components, including the heater, thermometer, and hygrometer, to ensure everything is in proper working order. Monitor the temperature, ventilation, and accessories for optimal performance. Address any issues or malfunctions before inviting others to enjoy the sauna experience.
Creating a Sauna Experience
Set the mood for a relaxing sauna experience by considering lighting, ambient music, and aromatic scents. Dimmable lights or soft lighting fixtures can create a tranquil ambiance, while subtle background music or nature sounds promote relaxation. Furthermore, essential oils or sauna fragrances can be used to enhance the sauna session.
Maintaining and Caring for the Sauna
To ensure the longevity and performance of your traditional sauna, it’s important to develop a regular maintenance routine. This includes periodically inspecting the sauna for any signs of wear or damage, cleaning the sauna after each use, and following any specific manufacturer recommendations for care and maintenance.
Safety Precautions
While building and using your sauna, it’s crucial to prioritize safety. Saunas involve high temperatures and electrical components, so taking necessary precautions is essential for your well-being.
Fire Safety Measures
Install smoke detectors and fire extinguishers near the sauna to promptly respond to any potential fire hazards. Avoid flammable or easily combustible materials when constructing or decorating your sauna. Regularly inspect and clean the sauna stove or heater to prevent the buildup of flammable substances.
Electrical Safety in the Sauna
Ensure all electrical components, including the sauna stove and any lights or outlets, are properly installed by a licensed professional and meet safety standards. Never modify or tamper with electrical connections or wiring yourself. Avoid using electrical appliances or devices inside the sauna unless specifically designed for sauna use.
Sauna Usage Guidelines
Follow recommended guidelines for sauna usage, including suggested temperature and time limits based on personal comfort and health conditions. Hydrate properly before, during, and after sauna sessions to prevent dehydration. Listen to your body and exit the sauna if you feel lightheaded, dizzy, or uncomfortable.
Sauna Maintenance Safety
When performing sauna maintenance tasks such as cleaning, ensure the sauna is switched off, and the power supply is disconnected. Use appropriate cleaning products and tools, keeping in mind the high temperatures and potential sensitivity of sauna materials. If you suspect any electrical issues or malfunctions, seek professional assistance to prevent accidents or injuries.
Building a traditional sauna at home can be a rewarding and enjoyable project. By carefully considering the location, designing the sauna, gathering the necessary materials, preparing the space, building the structure, insulating, installing the heater, preparing the sauna room, and finalizing the sauna, you can create a personalized sanctuary for relaxation and wellness. Remember to prioritize safety throughout the entire process and maintain your sauna regularly for the best experience possible. Enjoy your own private retreat and embrace the soothing benefits of a traditional sauna in the comfort of your home.